> ## Documentation Index
> Fetch the complete documentation index at: https://docs.molin.ai/llms.txt
> Use this file to discover all available pages before exploring further.
# Custom actions API
> Supercharge your AI so it can take any action for your users.
The custom actions API allows you to define custom actions that can be triggered by users when they chat with your AI.
## Examples
Examples of custom actions include:
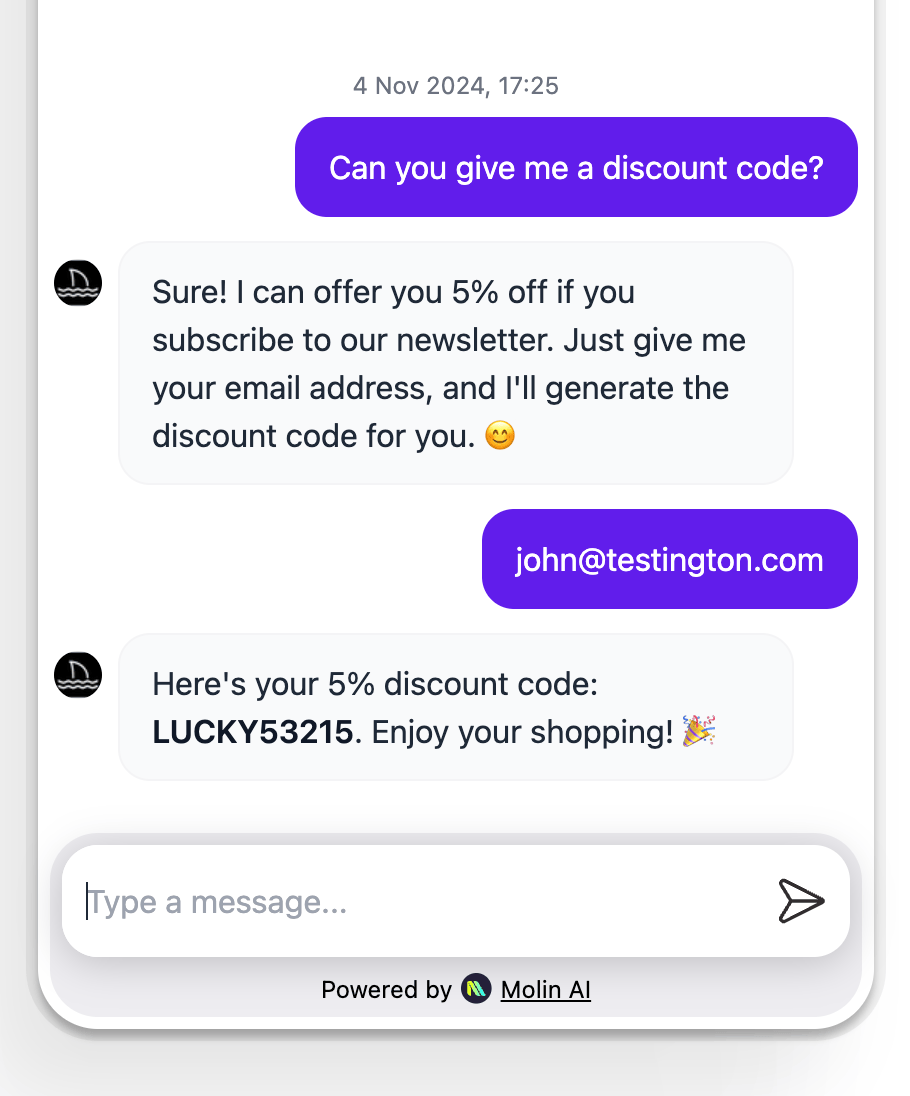
* Sending an email to the user with a discount code when they request one.
* Sending a message to a Slack channel when the user requests a callback.
* Providing product recommendations from your own database or inventory system.
* Collecting feedback from users and storing it in your own database.
* Collecting leads and storing them in your CRM system.
## How it works
1. You need to define a custom action in the [molin.ai](https://molin.ai) dashboard. You can define the name, description, and parameters that the action requires (e.g. email address, phone number, etc).
2. Your team needs to implement an API endpoint. This endpoint should accept the parameters defined in the dashboard and perform the action (e.g. generate a coupon and email it to the user).
3. You should enable the action from the dashboard and test it in the chat preview.
## How to create a custom action
1. Go to the [Actions page](https://molin.ai/app/actions) and click on the **New custom action** button.
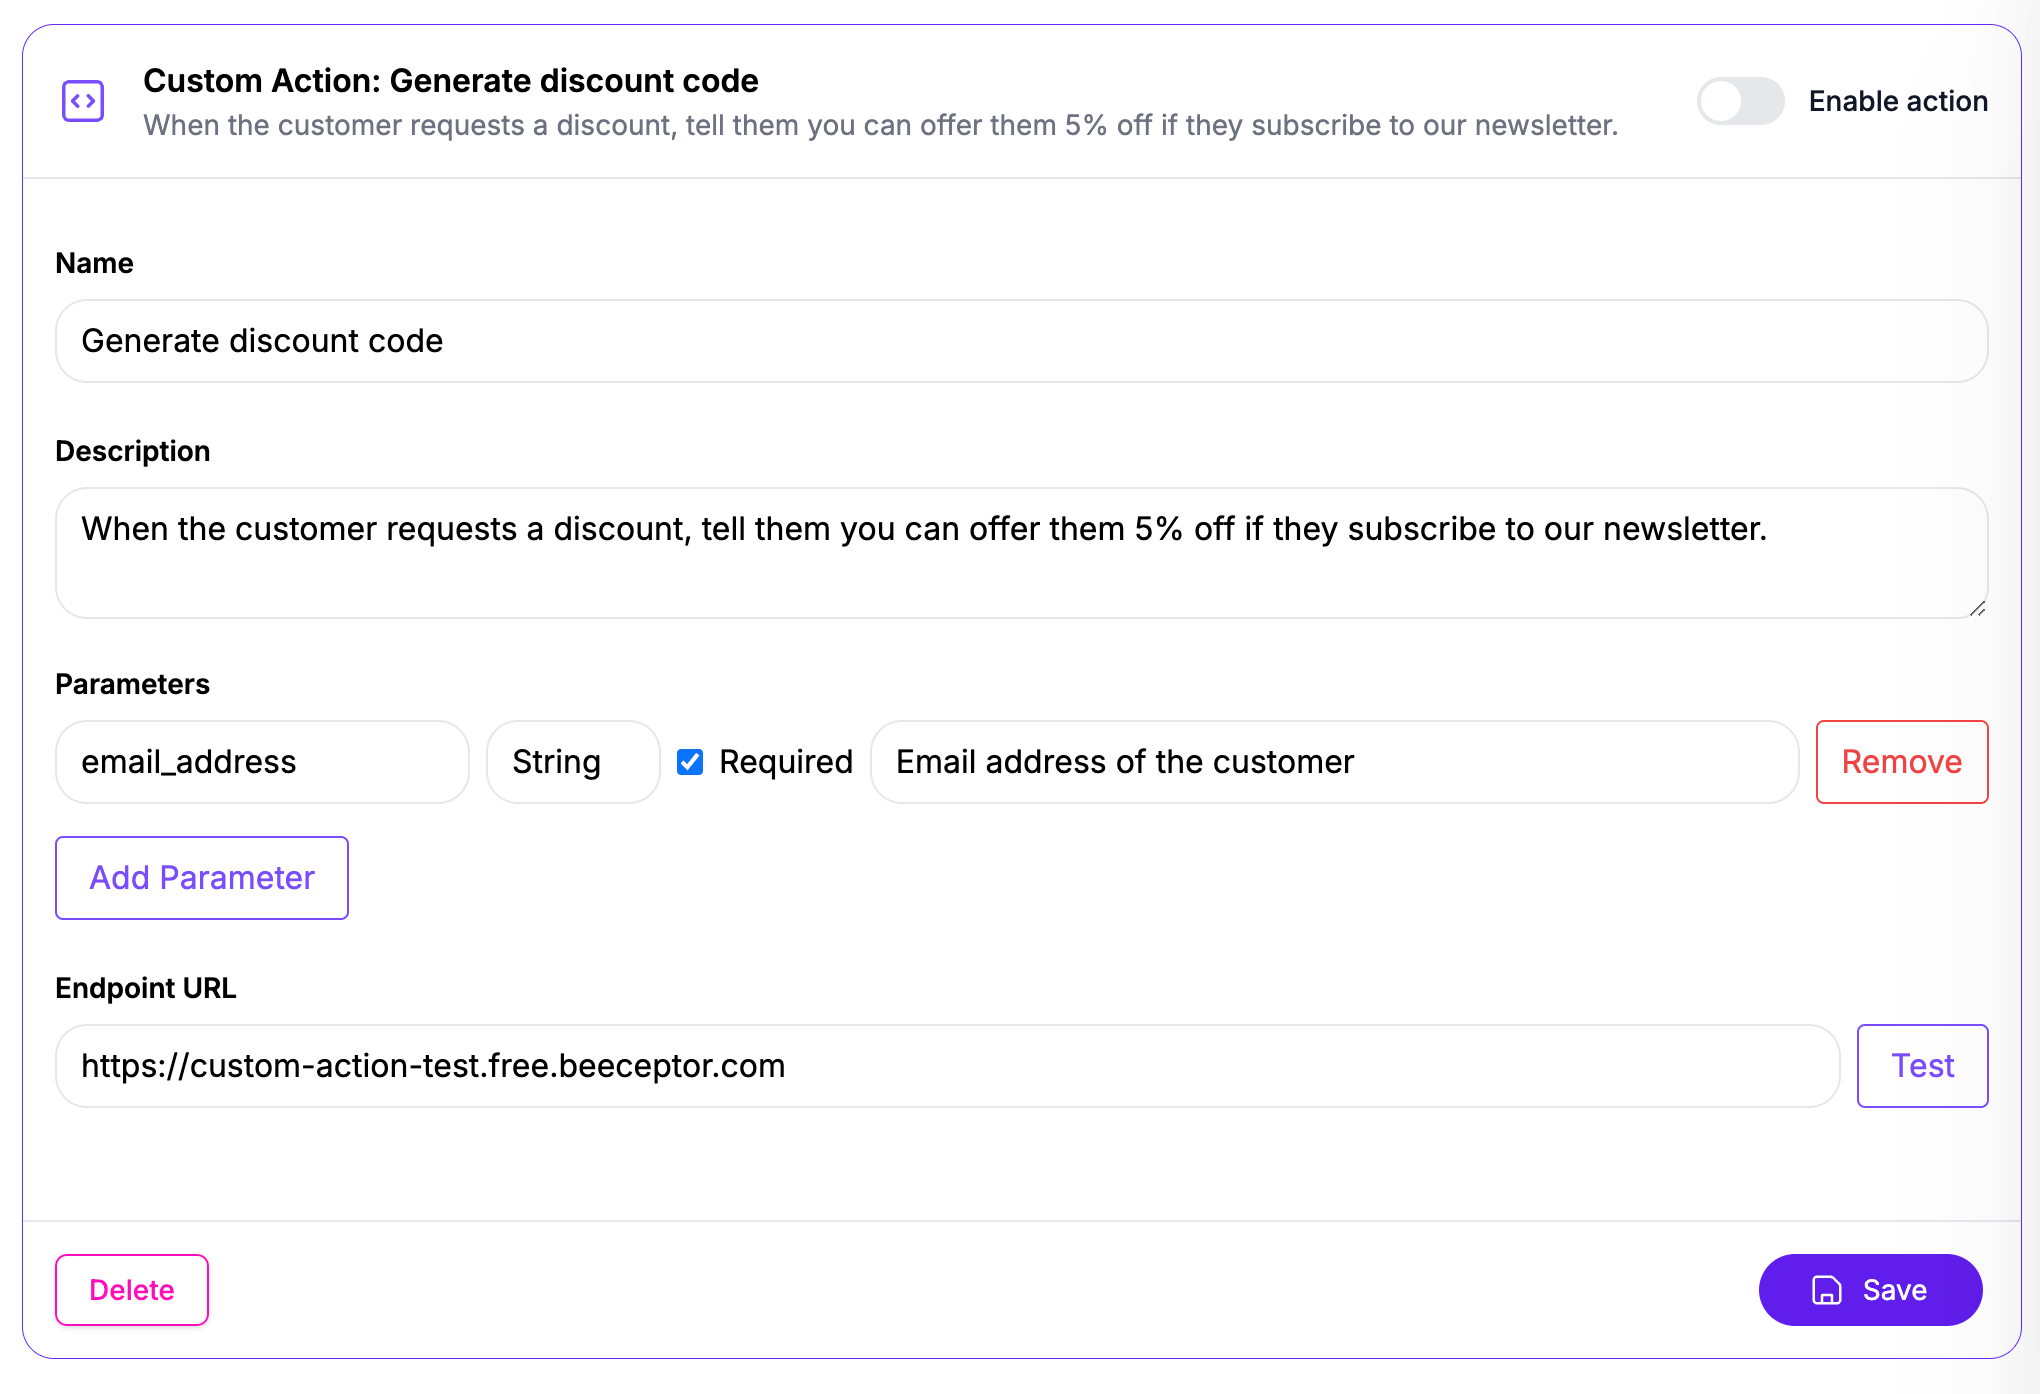
2. Fill in a **name** and **description**. The **name** should describe succinctly what the action does. The **description** should provide more details about the action. Both the **name** and the **description** will be given to our AI so that it knows *when* to call the action. *See the example screenshot below*
3. Define the parameters that the action requires. For example, if the action is to email the user a coupon, you might need the user's email address. You must define correctly the type of each parameter (e.g. string, number, or boolean).
4. Define the endpoint URL where the action will be triggered. This URL should be accessible from the internet via a **POST** request and should accept the parameters defined in the previous step. The endpoint should return plain text or JSON.
The entire response body from your endpoint will be given to the AI so it can respond to the user. Although the AI will only use the body to formulate its own answer, assume that the body *can* be
shown to the user.
## How to create your endpoint
You can use any stack to create an HTTP web server that conforms to the following requirements.
Only HTTPS endpoints are supported.
### Requirements
#### Request
The request will be a **POST** request with a JSON body. The body will contain the parameters defined in the dashboard. You can read the `x-molin-` headers to get additional information about the widget and conversation.
```
POST https://your-endpoint.com/your-action
Content-Type: application/json
x-molin-custom-actions-version: 2024-11-01
x-molin-widget-id: widget-id
x-molin-conversation-id: conversation-id
{
"your_defined_param": "some value from user input"
}
```
#### Response
The response should be plain text or JSON. The entire body will be given to the AI so it can respond to the user.
```
Content-Type: text/plain or application/json
any plain text or JSON
```
The response will be trimmed down to 8000 characters before being given to the AI. Make sure you don't exceed this length limit.
### Example
```
POST https://molin.your-shop.com/actions/generate-coupon-code
Content-Type: application/json
x-molin-custom-actions-version: 2024-11-01
x-molin-widget-id: widget123
x-molin-conversation-id: fce602af-39f2-4717-b2e0-698357b4f109
{
"email": "john@testington.com"
}
```
```
Content-Type: text/plain
Success. Generated coupon code: LUCKY53215
```
## Response format recommendations
While the AI can understand JSON and XML, we recommend that you format your response as human readable plain text or markdown.
The response will be trimmed down to 8000 characters before being given to the AI. Make sure you remove any unnecessary information to stay under the 8000 character limit.
For example, if your custom action returns the order history for your customer, we recommend the following format:
```
Order ID: SHOP123
Creation date: 2025-01-01
Items:
- 1 x Blue jumper
- 2 x Red socks
Total cost: 100 USD
Order ID: SHOP456
…
```
## Special UI card responses
Your custom action endpoint can return structured data that will be rendered as interactive UI cards in the chat. This provides a richer user experience for certain types of data like products and orders.
### Product Card
```json theme={null}
{
"url": "https://shop.com/product/123",
"name": "Product Name",
"description": "Product description",
"price": "$100"
}
```
### Order Card
```json theme={null}
{
"order_id_label": "Order ID",
"order_id_value": "RTX-789012",
"timeline": {
"step": [
{
"label": "Order Placed",
"status": "completed"
},
{
"label": "Processing",
"status": "completed"
},
{
"label": "Shipped",
"status": "in_progress"
}
]
},
"items": {
"item": [
{
"name": "Premium Cotton T-Shirt",
"quantity": "2",
"price": "$29.99",
"image": "https://placehold.co/400x300/orange/white/png"
},
{
"name": "Leather Wallet",
"quantity": "1",
"price": "$45.00"
}
]
},
"total_label": "Total",
"total_amount": "$104.98",
"customer_name": "John Doe",
"shipping_label": "Shipping",
"shipping_method": "FedEx Express",
"payment_label": "Payment",
"payment_method_label": "Method",
"payment_method_value": "Credit Card",
"payment_status_label": "Status",
"payment_status_value": "Paid",
"order_tracking_label": "Track Order",
"order_tracking_url": "https://fedex.com/track/RTX-789012"
}
```
#### Order Card with XML
You can also return order data in XML format:
```xml theme={null}
Order IDRTX-789012completedin_progressPremium Cotton T-Shirt2$29.99https://placehold.co/400x300/orange/white/pngTotal$104.98John Doehttps://fedex.com/track/RTX-789012
```
Timeline can have 1–5 steps. Status values must be one of: `completed`, `in_progress`, `pending`, or `failed`. Use `failed` for a step that encountered an error.
## Using a test endpoint for development
If you wish to test quickly, you can use [Beeceptor](https://beeceptor.com/), a free service that allows you to create a temporary endpoint that you can use to test your custom action.
You can use the following URL as your endpoint in your custom action:
```
https://custom-action-generate-coupon-code.free.beeceptor.com
```
You can view requests sent to it [here](https://app.beeceptor.com/console/custom-action-generate-coupon-code).
## Static IPs
All calls on behalf of custom actions sent to your server are made through the following IPs:
```
35.207.69.21
209.38.162.12
```
Make sure you allowlist all of them if your server has IP restrictions.